Unlock pro-grade embroidery! Confidently begin your digitising journey with this essential guide. Learn the critical difference between image and stitch files, understand vital concepts like pull compensation and stitch density, and discover the exact tools you need. Stop flawed embroidery—master the art of converting any design into a perfect, machine-ready file today.
The world of machine embroidery has exploded in popularity, transitioning from industrial secret to accessible hobby, yet one critical element often remains shrouded in mystery: embroidery digitising. This is the non-negotiable step that transforms static digital artwork—like a corporate logo or a cherished photograph—into a functional stitch file that your embroidery machine can read and execute.
It is the bridge between graphic design and textile art. Whether you are aiming for a successful embroidery business or simply seeking creative control over your personal projects, understanding this core process is essential for achieving truly professional, high-quality results. Poor digitising, even on the best machine, will always produce flawed embroidery.
Therefore, mastering the process is not just about using digitising software; it’s about understanding the complex interplay of thread, needle, and fabric mechanics. This comprehensive guide will break down the entire digitising journey, providing you with the necessary expertise, practical insights, and trusted answers to confidently begin your journey as a digitiser.
Defining the Art
What Exactly is Embroidery Digitising, and How Does it Work?
Embroidery digitising is essentially the process of manually plotting the exact coordinates, stitch types, and properties for every single stitch an embroidery machine will create, transforming an imported raster or vector image into a specific stitch file format (like .DST or .PES).
Crucially, this is not an automated conversion; it is a creative and technical discipline involving the application of underlay stitches, setting appropriate stitch density, and accounting for fabric movement known as pull compensation.
A skilled digitiser uses specialist embroidery digitising software to direct the machine’s path, dictating when to jump, trim, and change colour. For example, a satin stitch used on lettering requires precise cornering and density to look crisp and prevent the fabric from puckering or showing through. Ignoring these technical rules results in inferior machine embroidery designs that look amateurish.
What is the Difference Between an Embroidery File and a Regular Image File?
The fundamental difference lies in function: an image file (such as .JPEG or .PNG) is purely visual, composed of pixels or mathematical vectors that describe colour and shape for screen display or printing. In sharp contrast, an embroidery file is a command script. It contains detailed, sequential instructions that are read by the embroidery machine’s operating system.
These instructions include the precise X and Y coordinates for every needle penetration, specific commands for thread trims, colour changes, and the length, type, and angle of every stitch, such as run, satin, and fill stitches. Consider an industry standard like the. The DST file is purely a set of movement codes.
This distinction underscores why auto-digitising features in software often fail: they rely on reading visual information. Still, they cannot apply the critical, experience-based technical settings needed to compensate for real-world factors like fabric type and thread thickness.
Scope and Possibilities
What Types of Artwork or Designs Can Be Digitised for Embroidery?
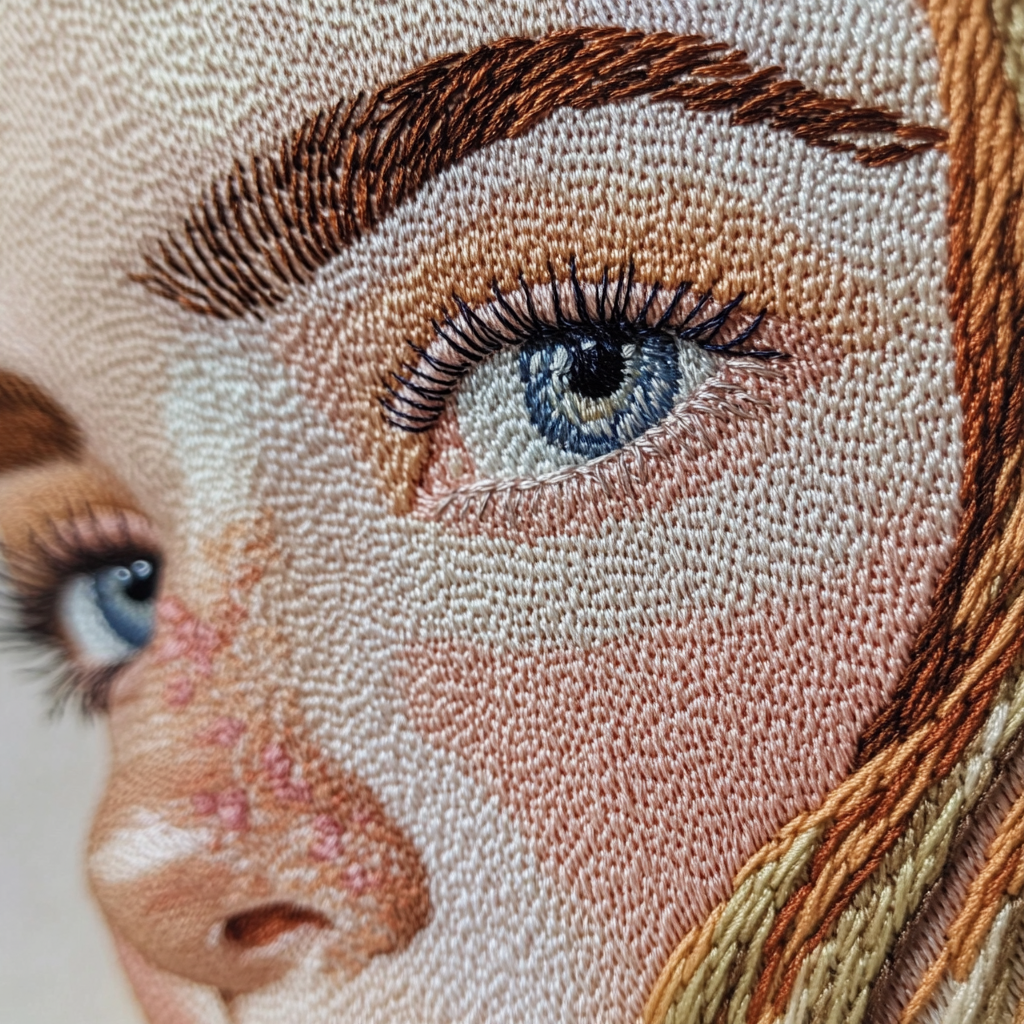
The scope of digitising is vast; virtually any visual artwork can be translated into stitches, ranging from complex corporate logos and detailed vector graphics to simple line art and even photorealistic portraits, using techniques like “photo stitch” or “colour blending.”
A good example is converting a child’s crayon drawing: a digitiser interprets the loose lines and colour blocks, translating them into organised, stabilised blocks of fill and satin stitches suitable for a wearable item like a T-shirt.
However, the final output always depends on the suitability of the original art. High-quality vector art is preferred over low-resolution raster images because vector lines offer clean, scalable outlines for plotting stitch direction and shape boundaries, leading to superior embroidered results.
Are There Any Limitations to the Size or Detail I Can Put Into an Embroidered Design?
Yes, the limitations are physical, governed by the thickness of the thread and the diameter of the needle. Unlike printing, where ink can produce outstanding detail, embroidery has hard constraints.
For instance, attempting to digitise text smaller than 5 mm in height often results in illegible, “plugged” stitches that fuse. Similarly, minute details in a logo, like 0.5 mm lines, simply cannot be rendered with standard embroidery thread.
A professional digitiser understands this and will proactively edit the artwork before digitising, removing overly fine details, separating colours, and increasing the minimum width of thin lines to ensure the final stitched product is clean and durable. This necessary compromise between digital fidelity and textile reality is a hallmark of expert digitising.
Can I Use Digitising to Create Patches, Appliqué, or 3D Puff Effects?
Absolutely, embroidery digitising is the prerequisite for all these specialised techniques, as they require specific, sequential machine instructions. For patches, the digitiser must program a specific stitch of the run outline before the final satin border to secure the patch to the base fabric or backing.
Appliqué requires a distinct sequence: a placement line, a cutting line, and then a final covering stitch. 3D Puff effects are the most complex; they require lower stitch density to allow the underlying foam to expand properly, followed by specific stitch routes that cut and tear the foam cleanly away.
The successful creation of a sharp, clean 3D puff design hinges entirely on the digitiser’s ability to manipulate stitch direction and density, which is a key element of advanced machine embroidery techniques.
Skills and Learning Curve
Must I Have Artistic or Drawing Talent to Become a Successful Digitiser?
This is a common misconception; artistic talent is not required to excel at embroidery digitising. While a good eye for colour and composition is helpful, the skill set is primarily technical and logical, drawing more on spatial reasoning and an understanding of physics than fine art.
The process is less about drawing and more about tracing, plotting, and applying technical rules to a pre-existing image. Many globally recognised, award-winning digitisers readily admit they cannot draw freehand but succeed because they have mastered the logical rules of how thread tension, fabric stabilisation, and stitch direction affect the finished product.
Think of it as painting with logic: you need to know when and where to place your strokes (stitches) for stability and visual texture.
How Much Time Does It Typically Take to Learn Embroidery Digitising Skills?
The learning curve for embroidery digitising varies dramatically based on your goals and consistency. To grasp the basics—how to place a simple fill stitch or a satin stitch border—might take just a few weeks of dedicated practice.
However, reaching a level of proficiency where you can confidently tackle challenging materials like performance wear or fine silks and achieve consistent, pucker-free results typically takes six months to a year of constant work. Achieving true mastery, where you can reverse-engineer complex designs or correct poorly digitised files, is an ongoing process that can take several years.
The key metric for progress is not time spent, but the number of successful sew-outs you complete and critically analyse for improvement.
What Core Concepts (Like Underlay and Density) Must a Beginner Understand?
A beginner must absolutely master three core technical concepts that dictate the quality of all subsequent work: Underlay, Density, and Pull Compensation. Underlay stitches (often a criss-cross pattern) provide a vital foundation, stabilising the fabric and preventing the main top stitches from sinking into the material.
Density refers to the spacing between needle penetrations; too dense, and the design becomes stiff and prone to needle breaks; too loose, and the fabric shows through. Finally, pull compensation is the most crucial; it involves deliberately widening the edge of a shape in the software to counteract the fabric’s tendency to be drawn inward (or “pull”) by the tension of the top thread, ensuring the embroidered shape matches the artwork.
Essential Tools and Equipment
What Essential Tools and Software are Required to Begin Digitising?
To embark on your embroidery digitising journey, you will need a few key components. The most critical item is the specialised digitising software itself (such as Wilcom, Hatch, or Embrilliance), which acts as your workstation for plotting stitches and applying effects.
Equally essential is a reliable embroidery machine, which serves as your testing lab; without stitching out your designs, you cannot identify or correct errors in density or pull compensation. Additionally, you will require a good supply of stabiliser (backing material) suitable for various fabrics and, ideally, a high-quality pen tablet (like a Wacom), which allows for much finer, more natural control over the manual plotting process than a standard mouse.
Do I Need an Expensive Commercial Machine, or Can I Start with a Home Embroidery Machine?
For learning the fundamentals of embroidery digitising, a quality home embroidery machine is entirely sufficient and highly recommended. Commercial machines, while offering higher speeds, multi-head production, and broader capabilities, execute the same instructions programmed by your software.
The digitising learning process is about understanding the output, regardless of the machine’s scale. The key requirement is that your chosen machine uses one of the major stitch formats (like .PES, .JEF, or .DST) so you can test your digitised files. Investing in expensive commercial hardware before mastering the software is unnecessary and financially unsound for a beginner focused on digitising expertise.
Is a Graphics Tablet Necessary, or is a Standard Mouse Sufficient for Digitising?
While a standard mouse is technically sufficient for navigating the digitising software and performing basic functions, a graphics or pen tablet offers significant advantages that substantially improve efficiency and accuracy. When manually plotting complex shapes or following fine details, the pen provides a natural, fluid motion that translates to smoother vector lines and more accurate plotting points than a cumbersome mouse.
This leads to less fatigue and a higher quality of manual tracing. Furthermore, for those interested in freehand effects or creating their own custom artwork within the software, the pressure sensitivity and intuitive control of a pen tablet are invaluable for achieving a truly professional and clean digitising result.
Getting Started
What is the Best Step-by-Step Way for a Complete Beginner to Start Learning?
The most effective approach for a beginner is to follow a structured, five-step process that prioritises theory and testing.
- Step one involves learning the core embroidery theory—how thread and fabric interact.
- Step two is mastering the basic functions of your chosen digitising software, such as creating simple shapes and applying standard fill and satin stitches.
- Step three is digitising a straightforward, single-colour design, like a block letter ‘A’.
- Step four is the critical test sew-out on your machine.
- Step five involves a detailed, objective review of the stitch-out to identify errors (puckering, gaps) and returning to the software to adjust settings like pull compensation and density. This iterative loop of theory-digitise-test-review-adjust is the most direct path to digitising success.
Where Can I Find Reliable Resources and Free Tutorials to Master the Theory?
Award-winning digitisers or established industry leaders often provide the best resources for mastering embroidery digitising theory, as they possess the decades of E-E-A-T (Expertise, Experience, Authority, Trust) that beginners need.
Look specifically for free video courses or comprehensive cheat sheets that focus on the why—why does this fabric require more underlay, or why does a small letter need a different satin stitch density?
Many quality software manufacturers provide detailed documentation and tutorials that, while promoting their own tools, still contain fundamental knowledge on stitch types and fabric stabilisation, which are universal laws in machine embroidery. Avoid sources that only offer “auto-digitising tips,” as they bypass the essential technical learning.
How Should I Approach My First Digitising Project for the Best Results?
For your very first digitising project, choose simplicity above all else to ensure the foundational learning is solid. Select a small design, no larger than 8 cm by 8 cm, that features distinct, easily defined block shapes and uses only one or two colours.
A classic choice is a simple circle or square with a clean satin border. Use a highly stable, non-stretching fabric like heavy cotton twill, and pair it with a suitable tear-away stabiliser. Your primary focus should be on correctly applying a light underlay, ensuring the final satin stitches meet perfectly to close the shape, and making a minor adjustment for pull compensation. Resist the temptation to jump to complex logos or fine lettering; master these basic geometric shapes first, as they are the building blocks of every complex embroidery design.
Conclusion
Embroidery digitising is truly where the digital realm meets tangible craft, offering unparalleled creative control over the machine embroidery process. This discipline is more than just navigating digitising software; it’s an art form rooted in logic, requiring you to anticipate how physical thread interacts with textile surfaces.
By meticulously studying essential technical concepts like stitch density and pull compensation, you gain the ability to consistently produce professional-grade embroidery that resists common flaws like puckering, gapping, and thread breaks. Whether your ambition is to launch a thriving custom embroidery business or unlock the full potential of your home machine, the investment in mastering this skill offers a massive competitive edge. It significantly enhances the quality of your finished products.
The only way to discover if this rewarding technical challenge is for you is to dive in. Start your digitising journey today by focusing on the foundational theory, embracing the vital feedback loop of stitching and correcting, and elevating your craft from hobbyist level to expert with these trusted insights.
